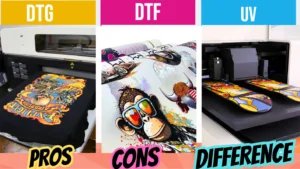
Direct to garment (DTG) printing:
Direct to garment (DTG) printing is the most recent breakthrough for printing on fabrics in small or big quantities, with the benefit of achieving any number of colors and no repetition size limits. Direct-to-garment printing, often known as digital printing, has revolutionized the capacity to produce colorful images and complex designs fast and economically. Screen printing involves a complicated procedure because of things like color separation, setup time, and the number of colors needed. Additionally, it can be expensive and time-consuming to incorporate photographic graphics onto fabric. Direct to Garment (DTG) printing, on the other hand, provides a quick and economical alternative by printing the artwork file directly onto the clothing using inkjet technology, similar to a typical paper printer found in homes or workplaces. Garments inspection, pre-treatment, printing, post-treatment, and final inspection are all part of the work process.
History behind Direct to Garment (DTG) Printer:
In the 1980s, the garment industry began to use all-over printing. While roller printing was formerly prominent, flatbed and rotary screen printing techniques have since gained popularity. People’s tastes and requirements have altered with the passage of time, especially among the younger generation, who are particularly sensible of their clothes and decisions regarding fashion. As a result, global demand for all-over printing is continuously expanding, especially in Bangladesh.
All-over prints are used on a variety of goods, including t-shirts, shirts, jeans, three-piece suits, and bed linens. However, screen printing processes for all-over graphics have stipulations. Flatbed or rotary screen printing cannot support all forms of patterns, and due to high printing costs and equipment complexity, only up to 12 colors are commonly employed. Furthermore, screen printing is ineffective to highlight photo prints and 3D effects. To overcome these issues, the printing industry has developed a new method known as Digital Textile Printing or Direct-to-garment (DTG) printing.

Direct-to-garment (DTG) printing, often known as Digital Textile Printing is a process that embosses bright graphics on a variety of materials, most often the garments, using digital ink-jet printing technology. It allows for the simple and exact printing of any pattern on garments, making it a very promising innovation in the textile sector. DTG printing does away with the requirement for screens and eliminates color limits. Furthermore, it is ideal for printing 3D creations. This approach enables for direct printing on garments such as t-shirts, shirts, and jeans while keeping design quality.
Direct to Garment (DTG) printing process on T-Shirt :
The complete Direct to Garment (DTG) printing process on T-Shirt mainly involves 3 steps:

Pre-printing process:
Pre-printing process is like preparation for the upcoming procedure, before you paint. It helps the process for adhere better to the t-shirt or other garment. You can print without pretreatment, but it negatively impacts the vividness of the print and the washability. It can be categorized by the following steps:
1. Design Receive:
The Purchaser provides the design at first. The accuracy of the information provided is then confirmed through a careful analysis. After that, the design is discussed at a technical meeting, and any issues are brought up with the merchandiser or buyer.
2. Design Development:
Preparing the Design for DTG: The designer creates the design based on the specifications provided. We are able to modify the design to meet particular requirements and also offer our own concepts and ideas to fit the needs and themes of the customers.
Design Transfer from RIP Station to Operating Panel: Using Caldera or other software, the image files meant for printing are transmitted to an external Raster Image Processor (RIP) server. The RIP station separates the colors, and then the operational panel receives the image from the RIP server.
3. Garment pre treatment:
A pre-treatment process is carried out using the proper chemicals to ensure successful printing on the garments. By doing this, the print is preserved during successive washings. The garment is carefully stored in a poly material after pre-treatment is finished to shield it from wind and moisture. There are 2 ways to apply Pretreatment for garments:
Hand Spraying: For manual pretreating, the use of the sprayer to spray the garment as evenly as possible using a smooth back-and-forth motion.
Pre-treatment Machine: Various automatic pretreatment device is now available. With the help of this equipment, it is possible to precisely manage how much pre-treat chemical is sprayed, resulting in an efficient and reliable process every time. Simply put the garment on the tray, make any necessary adjustments to the pretreatment area, and press a button to start the pretreatment solution spraying onto the cloth. Use a scraping instrument to distribute the pre-treatment liquid uniformly across the fabric’s surface. Finally, use a heat press machine with a fixed temperature of approximately 1600 C to dry the pretreated clothing for 1-2 minutes.
Printing process:
- Garment Loading: The pre-treated garment is loaded to the entry side of the machine. Before loading the garment on entry side, all necessary parameter must be cleaned properly. Place the garment on the printer plate evenly without any wrinkle. During printing all sensor adjustment must be done. When we load garment on printer plate, the tension unit monitor is used. Garment on printer plate must be even for avoiding crush and print smooth.
- Select Image/Design and Print: To enable proper printing, Direct-To-Garment (DTG) printers frequently need specialized software called a Raster Image Processor (RIP). With the use of this program, any image or complex design may be printed precisely. Choose the image you want to print first. Next, decide on the area’s precise dimensions and shape so that the design can be printed there. In order to establish the price of the garment, you can also figure out the color settings and the cost of the printing ink. Press the print button once the image has been properly set up. You will access the printer control software as the print identifier, choose the file, and start the printing procedure by clicking the start button.
post-printing process:
To set the inks and improve washability when the printing process is finished, the garment must be cured. The typical drying time is 1-2 minutes at approximately 1600 C. However, certain clothing may be able to cure at somewhat greater temperatures for a shorter period of time.
Flow Diagram for direct-to-garment (DTG) printing:

The pros and cons of direct-to-garment (DTG) printing:
| Pros | CONS |
| Fast turn around time for small orders. | Not cost effective for larger runs. |
| Easily print tons of colors; Great for photos. | Slow printing time per shirt. |
| Cost-effective for smaller runs. | Not available on all colors or materials. |
| Reduced manpower. | Limited design placement. |
| Nickle free. | Lack of efficient manpower. |
| Lower water and power consumption. | Print cost is very high. But it is reducing day by day. In small lots and sampling DTG is far convenient and cost effective than conventional forms. |
| Less Chemical waste. | The problem of the combination in new and old technology. |
| Large repeat size is possible. | Difficult to get high color yield if don’t use the suitable coating chemical and if the steaming is not perfect. |
| Reduced production space requirements. | Different fabrics behaves differently to the colors of inks; hence, color changes are there in digital print, despite the digital print file being the same. |
| Less printed inventory. | Poor fatigue properties. |
| Sampling and production done on same printer. | All types of garment can be print except blended. |
| Design innovation. | Need to maintain temperature and humidity for print unit. |

DTG printing vs Screen printing:
| DTG Printing | Screen Printing |
| DTG printing is the best option on a limited number of clothes, usually between 5-20 garments. | Screen printing is suitable for large number of production. |
| Due to the time required to print each t-shirt and the increased manufacturing costs, it might not be the best option for large volumes. | Time requirement is less in perspective of DTG printing, so it might be best option for large volumes. |
| DTG is the best choice since it enables for the printing of endless colors, which is great if your objective is to produce an intricate image or obtain photographic quality. | In contrast, screen printing needs a different screen for every desired hue. |
| DTG uses thinner ink, which enables the development of more complex graphics. | The vibrant inks used in screen printing. |
| It works particularly well on light-colored materials. | Mostly suitable for deep-colored materials. |
| Additionally, DTG’s usage of water-based inks results in a more environmental friendly process. | Screen printing is not a environmental friendly process. |
| For optimal results in DTG printing, garments with a composition of over 50% cotton are recommended. The liquid ink used in DTG printers can be repelled by other materials like polyester. As a result, DTG printing works best on 100% cotton clothing. | Screen printing is suitable for all types of clothing specially for blended. |
| Less Chemical waste. | More chemical waste in perspective of DTG printing. |
| More innovative design can be put on DTG printer. | Basically conventional printing process. |
| Lower water and power consumption. | Water and power consumption is more. |
Reference:
- https://www.sciencedirect.com/science/article/abs/pii/B9780857094339500109
- https://www.emerald.com/insight/content/doi/10.1108/JFMM-03-2020-0053/full/html


7 thoughts on “How to Print a T-Shirt on Direct to Garment (DTG) Printer”
To Much Helpful Topic
Sir ❤️
Many thanks my dear student Saim.
good job dost..
So good to see your valuable reply my dear friend. Thanks for the compliment and hope that I can serve well.
Nicely explained the topic.
Thanks.
Thanks for the appreciation.
Thanks Sayed for the compliment.